


Although a vital resource, water can be a nightmare for homeowners if their property and rooms are flooded. You might have heard horror stories about the water pool surrounding the ground or the basement filled with water to the point that the structure was permanently damaged. Poor drainage is the primary reason for this issue, and what can fix that is setting proper drainage solutions to protect the beauty of your home.
For people about to build their dream house or for folks looking to upgrade their drainage system by doing their legwork on the drainage solutions, we’re frequently asked whether weeping tiles are better or French drains. This article will provide all the necessary information on the weeping tile vs French drain debate, so without further ado, let’s get into it.
What is a Weeping Tile (Drain Tile)?
A weeping tile, also commonly called a drain tile, is a perimeter drainage system installed around the foundation of a building. Its main role is to redirect excess groundwater away from the foundation, preventing water pressure buildup that can lead to leaks, cracks, and basement moisture problems.
Rather than being a single tile, modern weeping tile systems typically consist of perforated plastic piping laid alongside the foundation footing. These pipes collect groundwater and channel it toward a safe discharge point, such as a sump pump or storm drain.
Key Functions of a Weeping Tile System
- Collects excess groundwater surrounding the foundation
- Reduces hydrostatic pressure against basement walls
- Helps prevent basement leaks, dampness, and water intrusion
- Protects structural integrity by minimizing long-term moisture damage
- Supports healthier indoor air quality by limiting moisture buildup
Where Weeping Tiles Are Installed
- Along the exterior foundation footing (most common in older installations)
- Along the interior perimeter of the basement floor (modern retrofit method)
- Connected to a sump pump system or gravity drain for water discharge
Common Materials Used
- Perforated PVC or plastic piping
- Gravel or crushed stone for proper drainage
- Filter fabric to prevent soil and debris from clogging the system
Installation Process of Weeping Tile
Installing a weeping system requires extreme precision and expert workmanship. From carving out the perfect slope, and installing the pipes, to working with professional equipment, and material, a professional waterproofing company like GJ MacRa can do the work with perfection. Having said that, we’ll give you the rundown of installing the system so you know the work requirements well in advance.
External Weeping Tile
Step 1: Digging The Trench
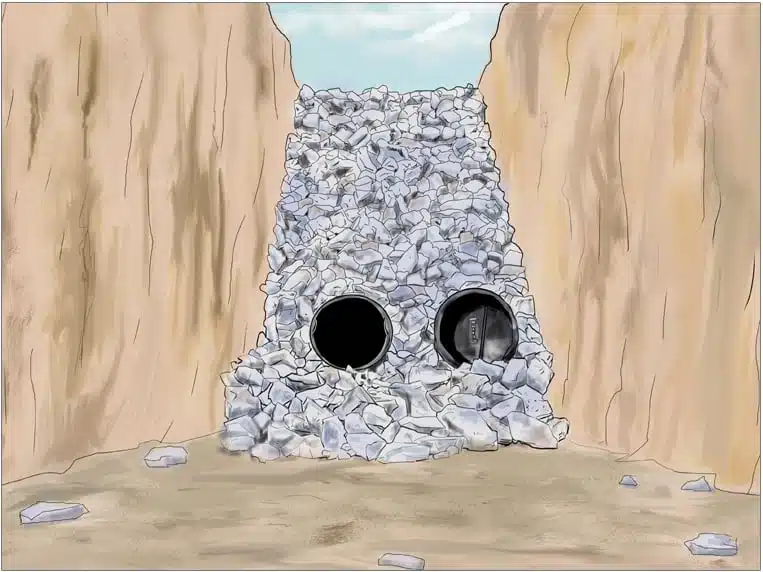
The work starts with digging a trench in the outer area of your house. The plants, pots, and shrubs in the digging area need to be relocated to make sufficient space to place the excavated soil from the digging. A 12-inch wide trench is formed with a one-inch slope for every eight feet, which goes down to the foundation.
Step 2: Placing The Gravel
At the bottom of the trench, gravel is placed up to three inches thick. Gravel is placed to act as a natural filter that enables the water to drain effectively without clogging. It is advisable to use granite or river gravel less than an inch thick as they are sturdy and durable for prolonged use.
Step 3: Installing The Pipe
It is pretty common to use PVC pipes since they’re highly durable and easy to maintain. You can easily find these pipes with pre-drilled holes especially made for draining. Wrapping the pipe with garden fabric or covering the stones eliminated any chances of the pipe being blocked by soil and debris. For future maintenance of the system, a visible clean-out joint is recommended.
Step 4: Refilling & Covering The Trench
Once the PVC pipe is covered to prevent blockage, the trench is filled with gravel or a mixture of sand and gravel to allow water to flow easily from the surface to the pipe.
Interior Weeping Tile
Step 1: Digging The Trench in The Basement
First, professional equipment creates a hole through the cemented basement floor. The gap must be 12 inches wide and must border around the foundation of the house. Then, the concrete from digging the hole is excavated to reach the gravel. Post that, a trench one to two feet in inches is dug.
Step 2: Adding Gravel
The bottom of the trench must be filled with enough washed gravel to allow water to seep into it.
Step 3: Installing The Pipe
The next step is to add the PVC pipe with pre-drilled holes to cover the entire area and connect it to the sump pump. The pipes are then wrapped around with garden fabric to prevent them from clogging and ensure a clear passage of water.
Step 4: Refilling The Trench & Fixing The Concrete Floor
The trench is then covered with gravel and left for a day for the arrangement to settle down properly. Then, cement is poured over it, and a smooth and uniform surface is created. This then completes the installation of the basement drain tile.
Advantages of Weeping Tiles
The benefits of installing the weeping tile system are the followings:
- Cost-effective Waterproofing: The weeping tile drainage system is an affordable solution to keep water away from your basement and protect your walls from growing moulds and chipping away. Houses that have weeping tiles installed have higher resale prices.
- Versatility: Both existing and under-construction buildings can install the weeping tile system since the exterior and interior installation options are available.
- Low Maintenance Waterproofing solution: During the installation phase, the pipes are wrapped with garden fabric and laid on a bed of gravel so that the pipe doesn’t get blocked with soil, weed, or any debris to ensure its longevity and prolonged use of the drainage system. Occasional inspection and cleaning suffice in this scenario, but it’s important to understand how and why weeping tiles can get clogged to ensure long-term efficiency.
What is a French Drain?
Now we proceed to the latter half of the drain tile vs the French drain, so let’s understand the working of the French drain. A French drain is a basement waterproofing system that uses perforated pipe laid on a trench to redirect surface water and groundwater from penetrating the house’s walls and pumping away where it does not harm the property. If you’d like a detailed breakdown of the process, check out our full guide on how does a French drain work.
By and large, the use of weeping tiles and French drain is predominantly the same- preventing water from entering the basements and damaging the property. However, the differentiation factor between the two is the installation of the system. The French drain system is installed on the ground level over a trench filled with gravel and rocks just below the surface to redirect the water to a septic tank drainage area to keep the property dry and flood-free. It is mandatory to conduct regular inspections and cleaning of the French drain to make them last long.
Installation Process of French Drain
Similar to the weeping system, French drain too requires professionals to do clean and precise work to protect your surroundings from the damage caused by water buildup. However, we’ve listed down the process of French drain installation to inform you of the complete installation process.
Step 1: Digging The Trench
Covering the surrounding of the property, a trench which is 1 to ½ foot deep and a foot wide is formed. For each pipe that has to be placed, a 1-inch slope is made, and the pipes are placed facing downward in the trench.
Step 2: Filling The Trench
Once the trench is dug, gravel and stones are placed at the bottom, which must be about 3 inches deep. The landscaping fabric is then laid over it to avoid the buildup of weeds, debris, clogging, or any other obstruction to disturb the smooth flow of water.
Step 3: Installing The Pipe
The grate inlet is placed at the surface of the trench when it is then connected with a pipe. The series of pipes are carefully laid with the drainage holes placed downwards and connected with one another till the drainage point.
Step 4: Refilling & Covering The Trench
Post laying the pipes over the trench, the trench is covered with gravel, and rocks, leaving a 5-inch space between the top of the gravel and the bottom surface. The gravel and pipes are covered with excess landscaping fabric. The trench can be covered entirely with soil and form a uniform area to reseed it, or it can be covered with landscaping stone.
Advantages of French Drain Tiles
The advantages of French drain tiles are listed below:
- Easy to Install: French drains are pretty easy and effortless to install compared to weeping tiles. A professional can dig the trench, install the pipe, and fill the trench in a day or two, depending on the area of your property, if any other existing structures don’t come in the way of the drainage line.
- Effective Water Management: French drain redirects the groundwater away from the property, stops it from penetrating the house’s walls and prevents the soil from erosion.
- Versatility: Since French drains are installed at the exterior part of the house to flush away the water, they can be installed in yards, gardens, low-lying areas, and any other external part of the house with water buildups.
Weeping Tile vs French Drain: Which to Choose?
Both weeping tile systems and French drains are designed to manage excess water, but they serve different purposes and are used in different drainage scenarios. Choosing the right solution depends on where the water is coming from, how it impacts the structure, and whether the issue is occurring above or below ground level.
A weeping tile system focuses on subsurface groundwater control around the foundation, while a French drain is typically used to manage surface or shallow water accumulation in outdoor areas.
Understanding the Difference
A weeping tile is installed at or below the foundation footing and works continuously to collect groundwater before it reaches the basement walls. It is commonly connected to a sump pump or drainage outlet and is essential for long-term foundation protection.
A French drain, on the other hand, is a gravel-filled trench with perforated piping designed to redirect surface water away from problem areas such as yards, driveways, or exterior foundation edges. It is most effective for managing water runoff rather than deep groundwater pressure.
Weeping Tile vs French Drain Comparison
| Feature | Weeping Tile System | French Drain |
| Primary purpose | Manages groundwater surrounding the foundation | Redirects surface and shallow subsurface water |
| Installation depth | Installed at or below foundation footing | Installed closer to ground surface |
| Typical location | Along exterior or interior foundation perimeter | Yards, landscaping areas, or exterior edges |
| Water source addressed | Subsurface groundwater and hydrostatic pressure | Rainwater runoff and surface pooling |
| Connection method | Usually tied to sump pump or storm outlet | Gravity-based redirection to lower ground |
| Impact on foundation protection | Directly reduces pressure on basement walls | Indirect protection through water redirection |
| Suitability for basement waterproofing | Core component of basement waterproofing systems | Supplemental drainage solution |
| Long-term effectiveness for wet basements | High when properly installed | Limited for deep foundation water issues |
Which Option Is Right for Your Property?
A weeping tile system is generally the better choice when:
- Water intrusion occurs in the basement or below-grade spaces
- Moisture is entering through foundation walls or floor joints
- There is ongoing hydrostatic pressure around the foundation
A French drain is more appropriate when:
- Water collects on the surface after rainfall
- Poor grading or landscape runoff causes pooling near structures
- The drainage issue is limited to outdoor areas
In some cases, both systems may be used together, with a French drain managing surface water and a weeping tile system protecting the foundation from groundwater below.
Conclusion
Whether it is to install weeping tile or French drain, GJ MacRa does an exceptional job of providing the best drainage solution for preserving the beauty of your basement and property. We’ve been delivering industry-leading waterproofing solutions since 1975 in the Great Toronto area, and our repeat customers and referral are a testament to our quality work. Hire us and experience remarkable waterproofing solutions at the most affordable rate.